 I love a wedge salad. They are simple and delicious. Ice burg salads were popular in the 1950s and 60s but have begun to resurface on menus. I had a similiar salad to this recipe at a resturant recently, which made me go home and recreate it. Mr. T also enjoys this type of salad because he thinks it is a manly way to eat a salad. I have made some "girly" salads in the past and he always has to comment on them. The conversation usually is as follows:
Mr. T -"Why did you go and ruin a perfectly good salad with those things?"
Me - "What things? The chopped pecans?"
Mr. T - "No, those other things. The oranges."
Me - "Oh, they are mandarin oranges. It's good, I promise"
Mr. T - "Num num num."
Ingredients:
Salad-
head of ice burg lettuce
4 strips of bacon
1 roma tomatoes
blue cheese dressing (see below)
head of ice burg lettuce
4 strips of bacon
1 roma tomatoes
blue cheese dressing (see below)
Dressing-
1 c. mayonnaise
1/2 c. sour cream
1/4 c. milk
1 T. white vinegar
1/4 t. sugar
1/4 t. salt
1/4 t. onion powder
1/4 t. garlic powder
1/4 t. dry mustard
1/4 t. pepper
1/4 t. Worcestershire sauce
5 oz. container crumbled blue cheese
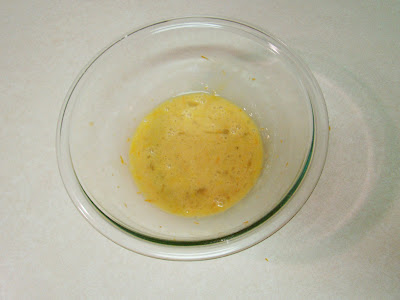
 So, lets start by making the blue cheese dressing. Begin by adding the milk, mayonnaise, and sour cream to a dish. I like to make the dressing in this pampered chef measuring cup because it has a lid. I don't use it because of the spout. This dressing is way to thick to actually pour. Any dish that you can seal would work great to make the dressing.
Mayonnaise is an emulsion. An emulsion is the mixture of two immiscible liquids. In the case of mayonnaise the immiscible liquids are oil and lemon juice or vinegar and water. To make an emulsion there must be an emulsifying agent, which acts to combine the two liquids. Egg yolk is the emulsifying agent in mayonnaise and has both an end similar in structure to oil and a water soluble end. When mayonnaise is made the oil is added to the vinegar and egg yolk. The mixture is then beat until the oil is broken into small spherical particles. These particles are surrounded by the egg yolk with the oil end facing the oil and the water soluble end facing outward.
 Whisk ingredients together. This is the base to a creamy salad dressing. From here you could add in fresh herbs, seasonings, or heck a package of ranch mix and make it ranch dressing.
  To the base of the dressing add the seasonings. This is an easy recipe to remember because everything is measuring to a 1/4t. Although it is not labeled on the picture, add one tablespoon of vinegar to the dressing as well.
 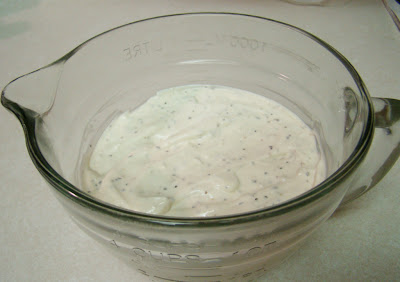 Yummy! I am sure that this would taste great on a salad, but it is still missing one key ingredient. THE BLUE CHEESE!
  Add in the entire package of blue cheese. I buy the crumbled blue cheese found near the deli in my grocery store. Does this picture look similar to the one before it? Because it is. I can't believe that I didn't get a picture adding the blue cheese in. Please excuse this HUGE mistake. It is actually killing me that I don't have it.
 I could add in some chemistry about how blue cheese is made or what it really is, but I will spare you from it. I want you to actually try this recipe.
Place the dressing in the refrigerator until you are ready to serve your salad. A couple of hours would be best. I think the dressing becomes better over time so the longer you can store it before using it the better.
 Now, to finish off the salad. Place four strips of bacon into a cold skillet. Placing the bacon in the skillet and then turning on the heat will keep the bacon from shriveling. Cook over medium heat.
 The bacon could also be cooked in a broiler pan in the oven. I prefer that method but cannot find the top to my broiler pan.
 While the bacon is cooking, turn your attention to the lettuce. The salad is called a wedge salad because we are going to cut the head of lettuce into just that, a wedge. I usually don't like ice burg lettuce for a salad by itself, it is very bland and boring. I tend to go for romaine or add spinach to a bag of ice burg lettuce. I vaguely remember hearing somewhere that there is no nutritional value to ice burg and that it is mainly water. Hope that isn't true or, well never mind a salad is a salad...
While the bacon is cooking, turn your attention to the lettuce. The salad is called a wedge salad because we are going to cut the head of lettuce into just that, a wedge. I usually don't like ice burg lettuce for a salad by itself, it is very bland and boring. I tend to go for romaine or add spinach to a bag of ice burg lettuce. I vaguely remember hearing somewhere that there is no nutritional value to ice burg and that it is mainly water. Hope that isn't true or, well never mind a salad is a salad...Don't worry about the brown spot, I will take care of it.
 Before cutting the head of lettuce we need to remove the base. Start by banging the base of the head of lettuce on the chopping block. It feels good, trust me! Then rip the base out. This step feels good too! This is actually very easy and not as gruesome as it sounds. See, brown spot was taken care.
 1/8 of a head of lettuce will be used as one serving for this salad. For the mathematically challenged. Take the head of lettuce and cut it in half. Take the first half of lettuce and cut that in half, now you have a 1/4. Finally, cut the 1/4 of a piece in half. There now you have 1/8 of a head of lettuce and I have a head ache. I knew there was a reason I didn't become a math teacher.
  Deseed and dice the roma tomatoes.
  Next it is time for the bacon. Look at those beautiful long strips of bacon.
 Chop the bacon.
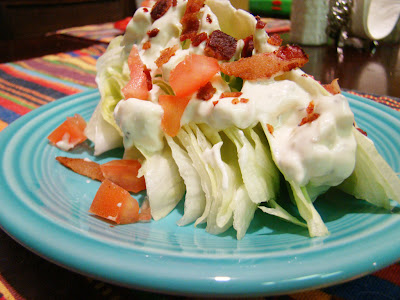
 On a plate, place the wedge of ice burg lettuce topped with blue cheese dressing, bacon and tomatoes. This is a great salad to serve along side a steak and baked potato. Which is a perfect meal for a Sunday night.
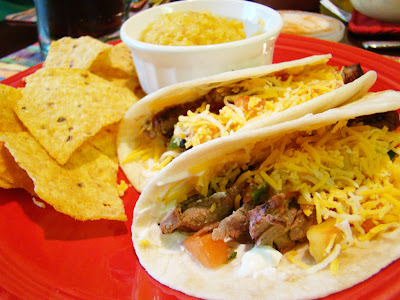
 Drain the can of mexicorn and place on a cutting board. Mexicorn has corn, of course, but along with that there are red and green bell peppers. The peppers are not hot at all, they simply add color to the dish. If you would prefer, this recipe can be made with a small can of corn.
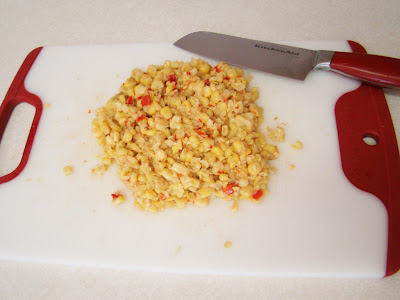 Roughly chop the mexicorn by running the knife through the pile a couple of times. Each individual kernel doesn't have to be chopped - just chop some of them up. Set the corn aside, it will be mixed in later.
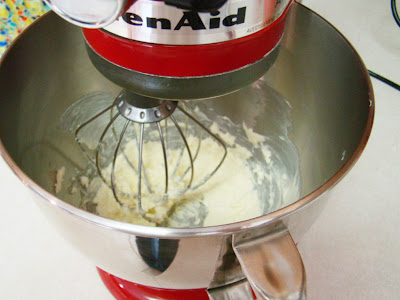 Whip the butter using an electric mixer. I love my mixer. It was a wedding shower gift that we had at Mr. T's church he grew up in. I remember I was so surprised and excited to receive this gift that my eyes were brimming with tears. He affectionately calls the ladies who gave us the gift, blue hairs. I am pretty sure he called them that in high school too.
 Add the chopped mexicorn and self rising cornmeal to the bowl. Again, mix until just incorporated on the lowest speed possible.
 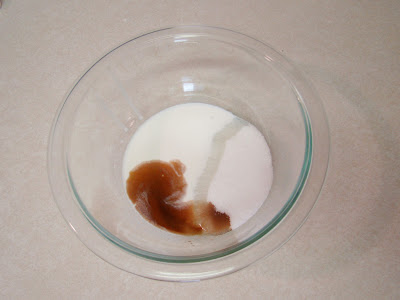 In a small mixing bowl, place the vanilla, half & half and sugar.
 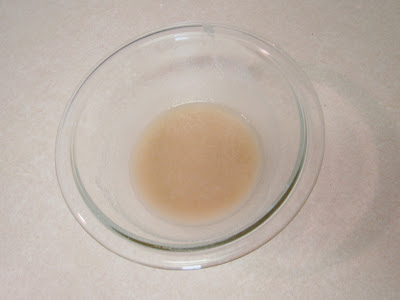 Whisk the ingredients together. This is how the recipe becomes sweet instead of just plain old cornbread. The vanilla is a great additive to the dish as well.
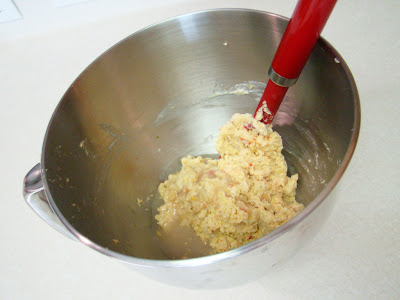 Put the sweet mixture into the mixing bowl with the cornmeal mixture. Lightly fold it in. Yummy!
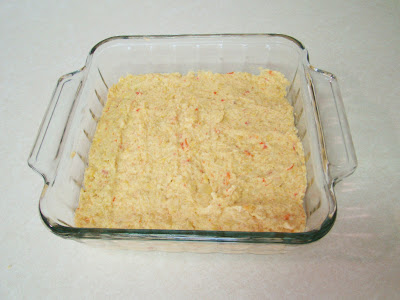 Pour the mixture into an ungreased 8x8 baking dish. Smooth the top of the batter with a spatula. It will be a little thicker and chunkier in consistency than say a brownie mix.
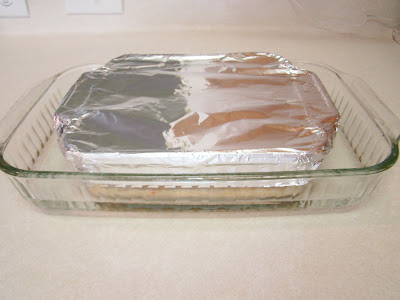 Cover the 8x8 baking dish with aluminum foil and then place in a larger baking dish. I used a 9x13 dish, but really anything larger would work. Pour very hot water into the second, larger dish until it is filled about 1/2 of the way. I used 2 cups of water that I microwaved in a measuring cup.
 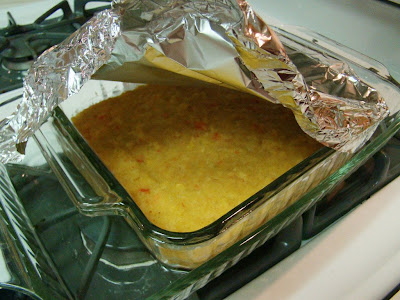 Bake the corn cakes at 375 degrees for 60 minutes or until it is cooked through. It should take the better part of an hour to cook, be sure not to peek - hard I know! Just let it do it's thing.

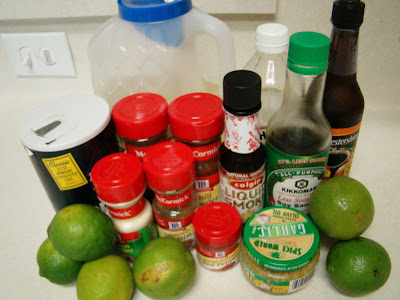 Ingredients:
 Combine all ingredients in a zip loc baggie. I like to place the baggie in a mixing bowl. That way I don't have to worry about holding on to the baggie while pouring in the ingredients or leaking.
 Be sure to get half a cup of lime juice. The juice is really the key part of the marinade. I like to use fresh limes, but hey I am also the girl that uses jarred garlic. If you want to buy bottled lime juice I wont judge.
  Place the steak in the zip loc baggie with the marinade. This is also an excellent marinade for chicken, but I prefer beef fajitas. Let the beef marinade for at least four hours and up to 24 hours. If you have time for it to marinate overnight, do it. Trust me.
 Grill the meat on an indoor grill pan or on an outdoor grill. Mr. T came home at a decent time so we decided to grill outside. Grill the steaks on medium high heat for four and an half to five minutes per side. Mr. T prefers his fajita meat to be cooked more thoroughly than a steak. He is the grill master in our household, but reduce the time if you would like some pink in the middle.
 Let the meat rest for a couple of minutes before slicing into it. I have found that an electric knife makes slicing the meat very easy - thank you Grandmama.
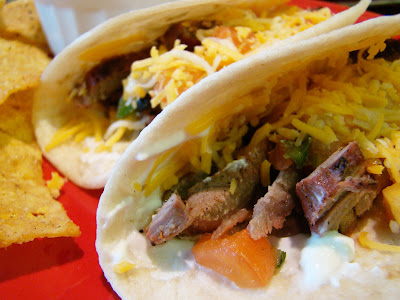 Garnish with pico de gallo and cheese wrapped in a warm tortilla. I feel obliged to state the following for anyone like my Grandfather: be careful not to over fill the tortilla or you will be forced to eat them with a fork and knife.
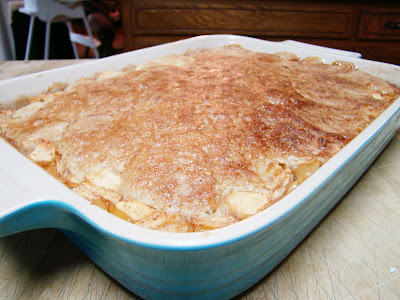
 There are not too many ingredients in this recipe. The best part is that other than the fruit, you probably have most of the ingredients in the pantry.
  You need eight cups of diced apples. This is somewhere between five to seven apples - I used all seven that I bought. Peel the apples. I used Gala Apples and they were yummy. I like to try to peel the apples into one long strip. It reminds me of that creepy movie,
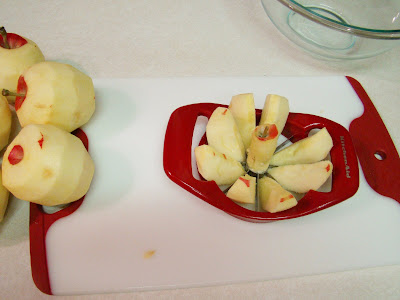 Since the dessert centers around the apples, I decided to use this apple corer and slicer. I wanted the apple pieces to be as uniform as possible.
 Dice the apples. They don't need to be paper thin but you also don't want them to be too chunky. My sister, the lib lawyer, and I were taught how to dice apples for baking from our Grandmother Ruth. Well, she isn't really our grandmother but she might as well be and it is the shortest explanation of how we are related to her. Ruth taught us how to make Sour Cream Apple Pie which is a Pennsylvania Dutch tradition. At some point in time I would love to put that recipe on here.
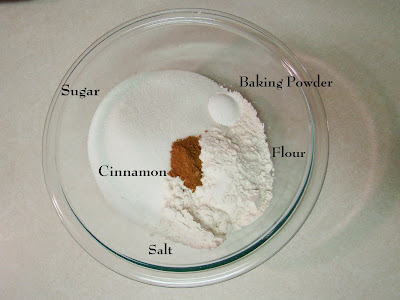
  Place the diced apples in a separate bowl. Add sugar, flour, cinnamon, salt, vanilla extract, juice, and butter.
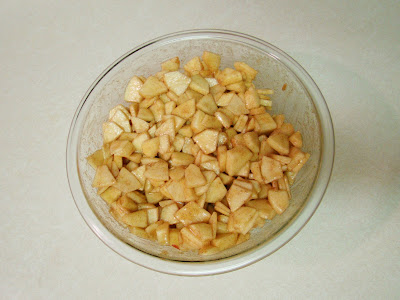 Go ahead and mix together with your hands.
 Let the mixture sit for at least an hour or overnight in the refrigerator. Look at all the juice that is made by letting the mixture macerate! Maceration is the process of producing juice by pulling out the liquid located in the fruit. It also softens the fruit and adds to the flavor of what you are making.
 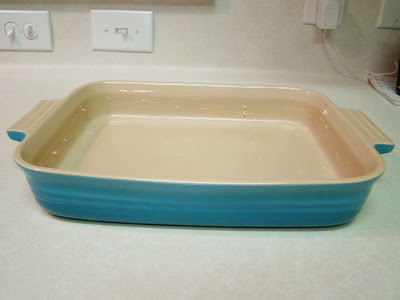 Grease a 9x13 dish with butter. Isn't this dish beautiful? I absolutely love the blue color. It was given to me by my sister-in-law last Christmas. The best part is that it was a complete surprise!
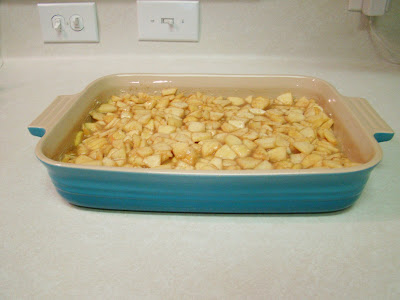
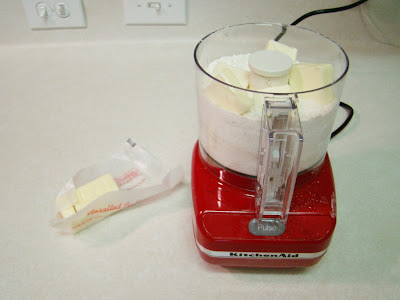
 Pulse until the contents of the food processor look like wet sand.
 Add the dry ingredients from the food processor to the wet ingredients you just whisked together.
 Incorporate the two together. I used my hands again, but I am crazy like that.
 Drop the topping mixture on the apple filling by the tablespoon. The recipe specifically states to do this by the tablespoon and not to spread the mixture. This is a perfect example of the fundamental difference between my sister, the lib lawyer, and myself. She spreads the mixture out and I don't. She is a rebel and I am a rule follower. In the end either way works.
  Bake the apple cobbler for 45 minutes to an hour or until the apples are soft. I also turned the broiler on for a couple of minutes to brown the topping. Serve with vanilla bean ice cream and enjoy!